One aspect of our business is to help those who own a rocking horse sell it to someone who wants to buy one for top dollar.
Getting your rocking horse in shape and presented well is the name of the game, so I begged, cajoled and begged some more to get Chris Pratt to help me out with this article.
Chris…

Hey there, partner! So, you’ve got yourself a busted-up rocking horse, huh? Well, don’t you worry none, because we’re gonna fix that bad boy up faster than you can say “yeehaw!”
Now, I ain’t no expert on this stuff, but I’ve had my fair share of run-ins with broken toys over the years, and let me tell you, I always come out on top. So, if you’re ready to roll up your sleeves and get down to business, let’s giddy up and get this show on the road!
Jump in:
How to clean a wood rocking horse
How to replace/repair the eyes
How to repair scratches on the rockers
How to replace missing wood plugs on the rockers
How to repair a broken wood ear
Wooden rocking horse replacement parts
Find a professional to restore your rocking horse
How to clean a wood rocking horse

Alright, folks, here’s your guide to cleanin’ a wooden rockin’ horse, Chris Pratt style! Buckle up and let’s get to it!
Step 1: Dustin’ – Grab yourself a soft cloth or a feather duster and start givin’ that rockin’ horse a good ol’ dustin’. Get rid of the loose dirt, cobwebs, and any other pesky debris hangin’ around.
Step 2: Spot Cleanin’ – If you spot any stains or sticky spots, no worries! Take a damp cloth or sponge and dip it in a mild solution of warm water and gentle dish soap. Wring out the excess water, and then gently wipe the affected area. Easy does it, we don’t wanna drown the poor horse! Once you’ve cleaned up the spot, wipe it down again with a clean, damp cloth to get rid of any soap residue.
Step 3: Deep Cleanin’ – Now, if your rockin’ horse needs a little extra TLC, it’s time for a deep clean. Mix up a mild solution of warm water and a few drops of dish soap in a bucket. Take a soft cloth or sponge, dip it in the soapy solution, and wring out the excess water. Gently clean the entire surface of that horse, makin’ sure not to go overboard with the water. We don’t want the wood gettin’ all warped! Once you’re done, wipe it down with a clean, damp cloth to remove any leftover soap residue.
Step 4: Dryin’ – After the cleanin’ spree, it’s important to let your rockin’ horse dry completely. Grab a dry cloth or towel, give it a few pats to soak up any moisture, or simply let it air dry in a well-ventilated area. But hey, avoid puttin’ it under direct sunlight or usin’ artificial heat sources ’cause we don’t want any warpin’ or crackin’ goin’ on, alright?
Step 5: Polishin’ and Protection – Now, if you wanna take things up a notch, it’s time to polish that beauty! Grab a wood polish or wax designed for furniture or toys. Apply it according to the instructions on the bottle, and then gently buff it with a soft cloth to bring out that shiny shine. Your rockin’ horse will be lookin’ dapper in no time!
How to replace missing jewels
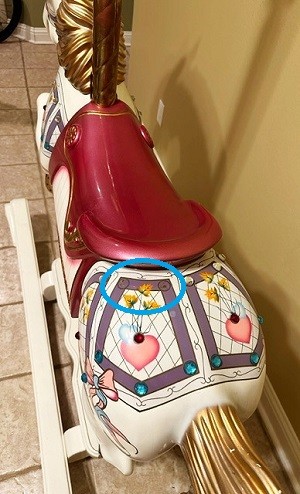
Hey, it looks like your rocking horse is missing some of its bling. But don’t worry, we can fix this faster than I can outrun a T-Rex. Here’s what you need to do: first, check if the horse has any missing jewels on its breast or hind-end.
If it does, you can easily replace them with some peel and stick jewels. You can find these at most arts and crafts stores or online. And the best part is, it’s super easy to find jewels with the same style and size to match.
So, go ahead and give your rocking horse the sparkle it deserves. And with those jewels in place, your horse will be ready to ride off into the sunset!
How to replace/repair the eyes

Howdy partners, it’s time to give your rocking horse some eyes that will make it come alive!
Now, some horses have painted-on eyes, while others have glass eyes. In my opinion, painted-on eyes are superior because the touch of an artist can do wonders.
But, if you’re looking for glass eyes, don’t worry. There are plenty of options out there. Check out these links on Etsy for a variety of sizes to choose from here and here.
So, let’s get to it and bring that horse to life! Yee-haw!
How to repair the rockers
Howdy folks, it’s time to get your rocking horse’s rockers looking shiny and new again! Over time, the rockers can get dirty, scuffed up, and the paint can chip or scratch. But don’t worry, we can fix this in no time.
For starters, let’s remove any loose dirt, dust, or debris from the wooden rockers with a soft brush or cloth. Then, let’s mix up a mild solution of warm water and dish soap in a bucket or bowl. Dip a soft cloth in the solution, wring it out, and gently wipe down the wooden rockers. Easy as pie!
Now, if there are stubborn stains or scuffs, let’s kick it up a notch with a paste made from baking soda and water. Apply the paste to the affected area, let it sit for a few minutes, then gently scrub the area with a soft brush or cloth. Wipe away any residue with a damp cloth and dry the rockers.
And finally, if the wood looks dull or faded, let’s add some shine back into those rockers. Apply a small amount of furniture polish or wax to a soft cloth and buff the surface in a circular motion.
How to repair scratches on the rockers
To help you out with those pesky scratches on your rocking horse’s rockers, my friend David Highland has some great recommendations on how to handle this situation. Let’s check them out!
“You might look into finding a lightly grit sandpaper or emery cloth, like that used by Autobody shops. They’re by far less abrasive and good for light scratches, but for deeper scratches, a 220 grit sandpaper, by hand, not powered, might be the way to go. It’s light enough to remove scratches and dings, but not enough to scar or burn the wood.”
David Highland manages the Rocking Horse Makers Group
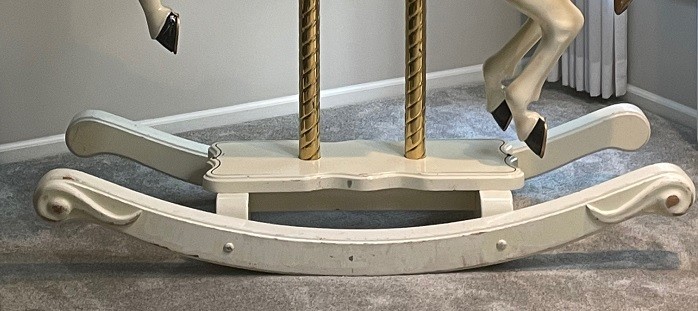
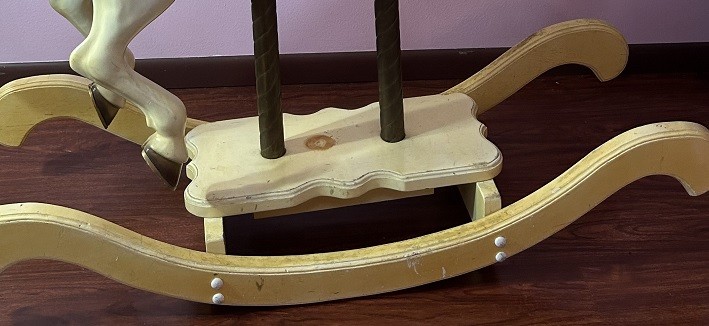
How to replace missing wood plugs on the rockers (they cover the screw holes)
Hey folks, if you’re missing some wood plugs on your rocking horse, don’t worry, we can fix this faster than I can tame a pack of raptors. Here’s what you need to do: first, check if any of the wood plugs are still on the rockers. If so, remove one and take it to an arts and crafts store to find the perfect match in size and color. Then, just tap the new plug into place.
If you need to paint the wood plug to match the rockers, it’s best to do that before installing it. And, in most cases, you’ll want to use the round, tapered, wood plugs that don’t need glue. Just tap them in for a tight fit.
But, if you’re missing all the original wood plugs, don’t worry. Just measure the diameter of the hole and find a plug that fits the size at the arts and crafts store. It’s that easy. And now the screws on your rockers are covered and look good again!
How to repaint the rockers

Ready to get your Rembrandt on?
Now I’m here to help you give your rocking horse’s rockers a fresh new look with a new coat of paint. Here’s what you need to do:
First, grab a damp cloth and clean the rockers to remove any dirt or dust. Once you’re done, let them dry completely.
Next, lightly sand the rockers in the direction of the grain. This will give the paint a better surface to adhere to.
Then, apply a coat of primer to the rockers. This will help the paint stick and cover any imperfections. Once the primer has dried, it’s time to apply the paint.
Use a brush or spray paint to apply a thin, even coat of paint to the rockers. Allow each layer to dry completely before adding another.
Finally, once the paint is dry, apply a clear sealant to protect it from chipping or peeling.
That’s it! Your rocking horse’s rockers will look as good as new.
How to repair a broken wood ear
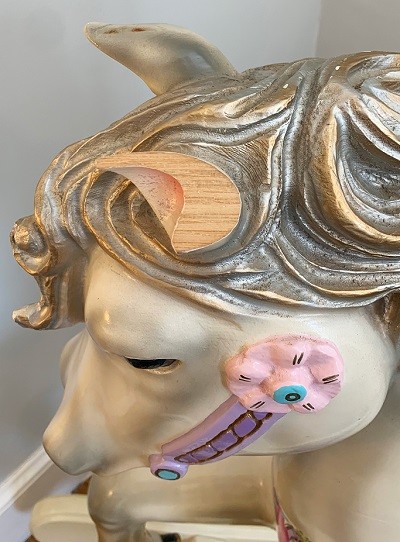
Hey there, so your rocking horse has a broken ear? No worries, it’s an easy fix! Here’s what you need to do:
First, clean the broken area with a damp cloth to remove any dirt or debris. This will ensure that the glue or putty can stick properly.
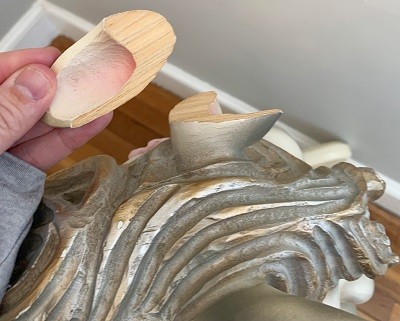
If it’s a clean break, just glue the ear back together using wood glue or epoxy. For small missing pieces, fill in the gaps with wood putty or other filler.
Clamp the ear to hold it in place while the glue or filler dries.
Once everything is dry, use sandpaper to smooth out any rough spots.
If necessary, paint the repaired area to match the rest of the rocking horse. That’s it, your rocking horse is ready to go!
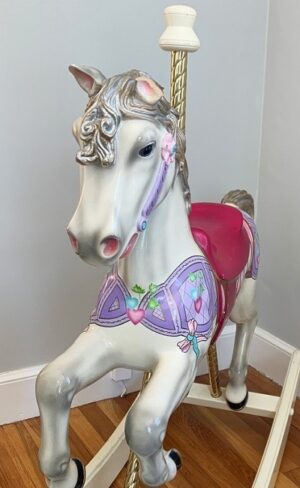
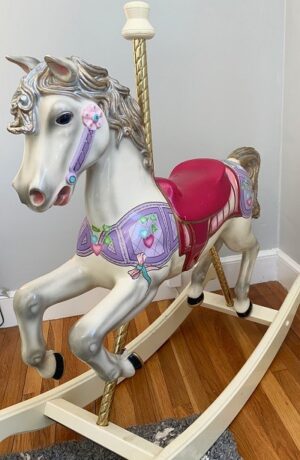
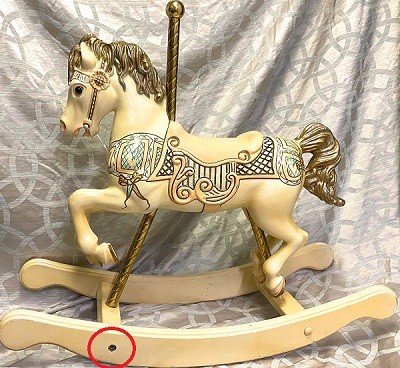
This particular horse is an S&S Woodcarvers rocking horse — one of the most collectible American-made rocking horses.
Wooden rocking horse replacement parts and restoration materials
Hey there! Are you in need of some replacement parts for your beloved rocking horse? Look no further! I’ve got some great resources for you to check out.
Carousel Workshop and Armor Crafts both offer a wide range of rocking horse supplies.
If you’re looking for natural horsehair for your horse’s mane and tail, check out this link on Etsy. There are many sellers on Etsy offering natural horsehair in various colors and lengths.
If you’re feeling crafty, you can even make your own yarn mane and tail! Check out these easy tutorials on YouTube: How to make a yarn mane for hobby horse and How to make a basic yarn tail.
And for stirrups, I found some lightweight options on Amazon that come in three colors. Or, if you want a complete harness and stirrup set, Armor Crafts has a great option for that too. Happy repairing!
How to repair the horse’s head, legs or body (or find a pro)
Hey there, if your rocking horse is looking a little rough around the edges with missing paint, scratches, or scuff marks on the head, legs or body, it might be best to leave the repairs to the professionals. Unless, of course, you’re a talented artist or want to hone your skills.
But don’t worry, I’ve got you covered! Check out this awesome video of an artist restoring a rocking horse:
If you’re in the USA or parts of Canada and want help finding a restoration artist in your area, just hit up my friends over at Carousel & Rocking Horses and they’ll hook you up with some contacts.
Well, there you have it folks! I hope this article has been helpful for you in repairing your beloved rocking horse. Remember, a little bit of love and care can go a long way in keeping your rocking horse in tip-top shape. From fixing scratches and broken ears to replacing the mane and tail, there’s a solution for every issue.
Thanks for tuning in, and happy repairing!
I manage Carousel & Rocking Horses bringing together buyers and sellers of hand crafted wood carved animals, rocking horses and carousel horses.
 Posts
Posts